Are your winter sweaters looking as tired as your neighbor’s Christmas decorations?
Without sewing a stitch, you can add some glamour to sweaters that are starting to lose their style.
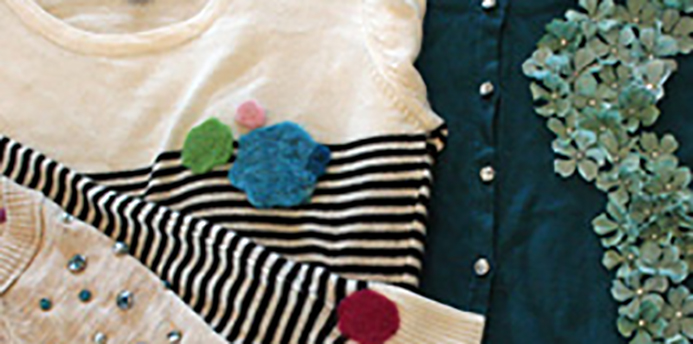
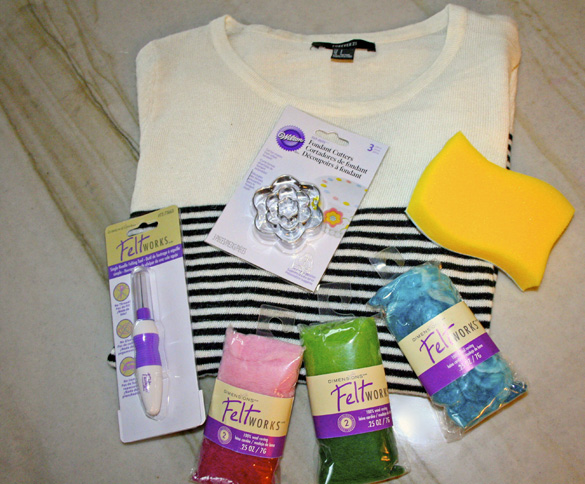
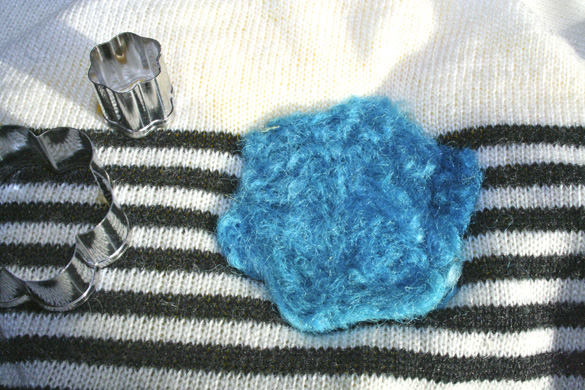
Sweater Upgrade #1: Wool Felting Appliqué
- One pullover sweater
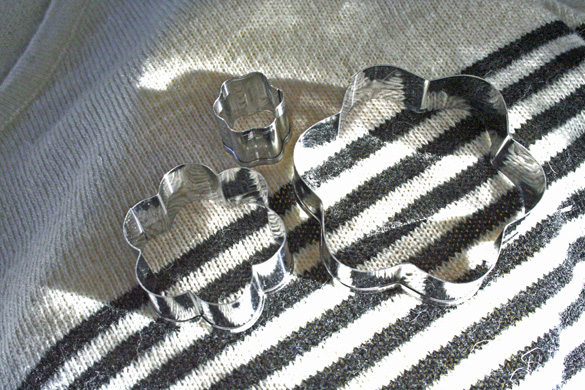
- A set of cookie cutters or fondant cutters of varying size
- Thick piece of foam as large as your biggest cookie cutter. I used a new foam sponge
- Wool Roving, various colors by Feltworks (Michaels Craft Store)
- 36 gauge Single Felting Needle by Feltworks (Michaels Craft Store)
- Iron
1. Decide where your appliqués would look best on your sweater. These could be great as elbow patches or you could literally wear your heart on your sleeve on one shoulder. I like to keep things off center, and unless you’re doing elbow patches, these look best in various sizes and in odd numbers.
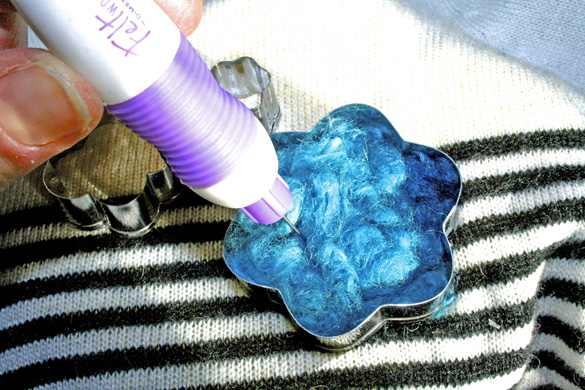
2. Once you have laid out your design, place the foam piece inside the sweater, beneath the spot to appliqué. Place your cookie cutter on top of the sweater and over your foam. Pull out some tufts of your wool roving, and place into the cookie cutter to evenly fill. Take your felting needle, and start stabbing straight down into the wool roving, sweater and foam. The needle will help the roving catch onto the other side of the sweater, leaving your appliqué attached to the top of the sweater.
3. Start on the inside perimeter of the cutter and work your way around stabbing the wool, then fill in the center while making sure to keep the needle at a 90 degree angle. Be very careful once you get going, or you will have an appliquéd, bloody finger!
4. Keep stabbing away until the surface becomes more even, and fill in any naked spots with additional roving. Remove the cookie cutter slowly while you double check that your desired shape has been conveyed, then work with the needle to tame any stray fibers. Carefully peel the sweater off of the foam piece, then iron your appliqué using a water mist and high heat to set.
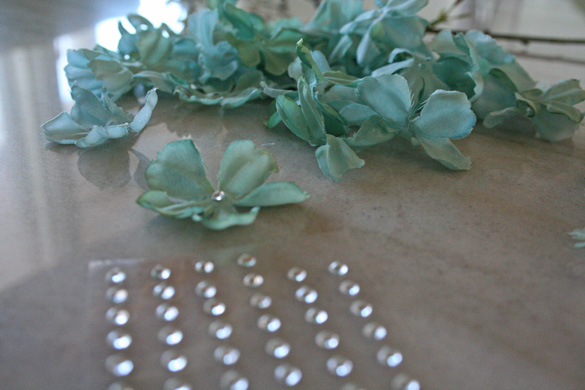
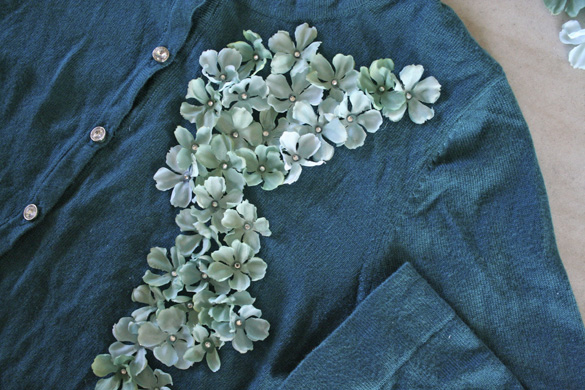
Sweater Upgrade #2: Flower Power
- Cardigan sweater
- One or two stems of silk flowers (Michaels Craft Store)
- Aleene’s Fabric Fusion Glue (Michaels Craft Store)
- Adhesive rhinestones, small gems, beads or pearls (Michaels Craft Store)
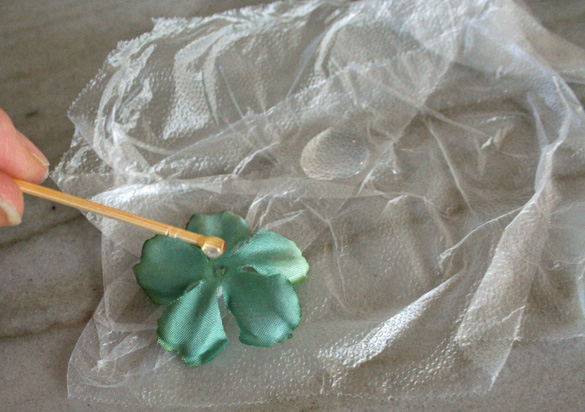
- A plastic bag or wax paper
- Toothpick

1. When picking your silk blossoms, bring your sweater, and pick a different shade, but the same color as your sweater. Choose a smaller blossom that can easily detach from the floral stem, and adhesive rhinestones or pearls that will fit the center of the flowers.
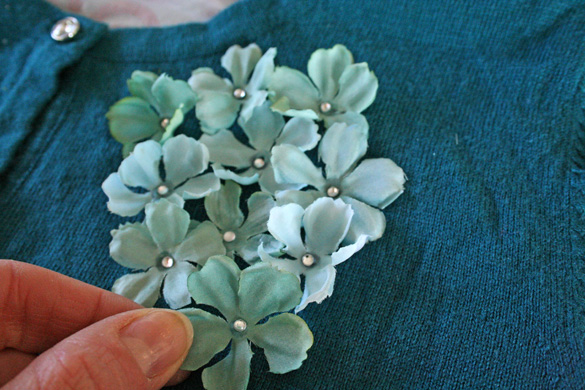
2. Detach all of the blossoms from the stem, and separate the layers of flowers into a pile. Put your wax paper or plastic bag inside the sweater and lay flat, so that the glue does not bleed through to the other side. Play with the blossoms, laying them in various patterns onto the sweater, to see what looks best. A free flowing pattern looks great on one side, but might overpower if you did both sides of the sweater in front.
3. Squeeze a little of the fabric glue onto a separate piece of wax paper or bag, and dab the end of your toothpick into the glue. Apply a small dab of glue to the back center of your blossom and apply it to the sweater. Use the toothpick and glue to then apply the gem to the center of the flower. The glue might appear as if it’s staining the flower, but it dries clear if used sparingly.
4. Keep applying the flowers close together in a tight formation, until you are happy with the result, and let dry for several hours. Once you are sure that the glue is dry, remove the plastic lining from inside the sweater.
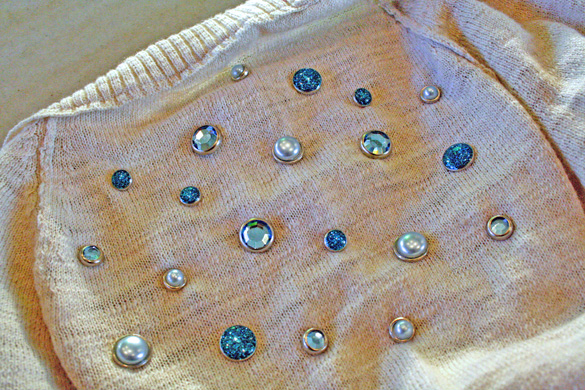
Sweater Upgrade #3: Your Closet Gem
- Plain pullover sweater
- A few packs of Gem Brads (Michaels Craft Store, scrapbooking aisle)
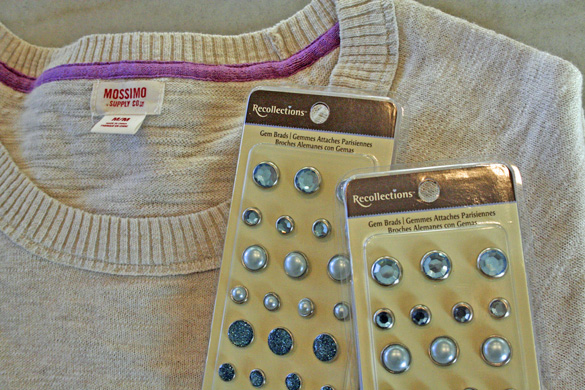
1. This one is the easiest yet! Take your simple everyday sweater, and lay out the Gem Brads in your desired pattern. I chose to apply them to the shoulder areas, front and back. If you work with a random pattern, it looks best to stick to the same color family, but various sizes. Keep your pattern evenly spaced.
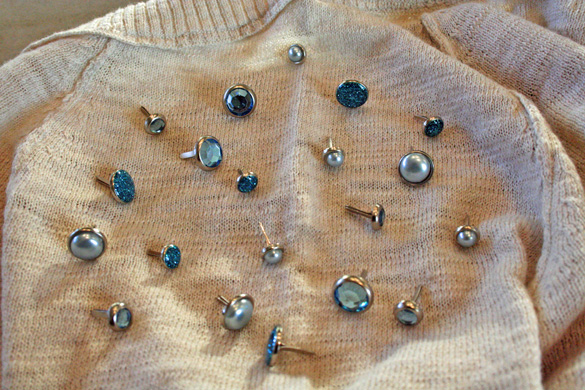
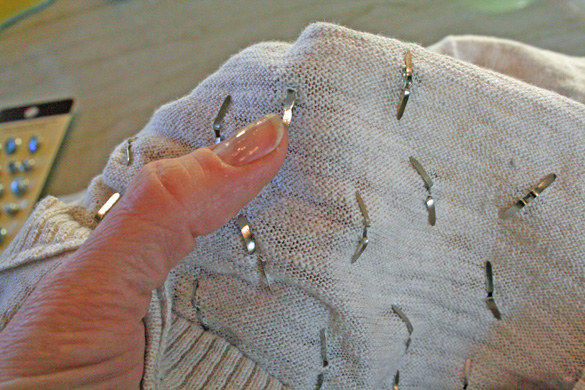
2. Poke the brads through the sweater, and open the brad closure in the back just as you would on paper. If you sew, you could apply a piece of fabric to the underside of your shoulder area to cover the back of the brads, but if you wear a shirt under your sweater, this is not necessary. This also gives you the freedom to change it up frequently, or remove them for cleaning.
Who knew that a trip to the craft store could make shopping your closet so much fun? Once you master these techniques, Mother Nature will not be the only girl on the block with a new look. Now if we could just figure out how to freshen up those neighbors…