Julia wore one while eating, praying, and loving. Gisele wears them on the beach (though does anyone notice anything else when she’s in her bikini?).
Wrap bracelets are the accessory of the moment, but for such a simple little design, they are priced more like an investment piece rather than something to throw on when trying to perfect the casual chic look. With some craft items and a few hours, you too can be rocking the look.
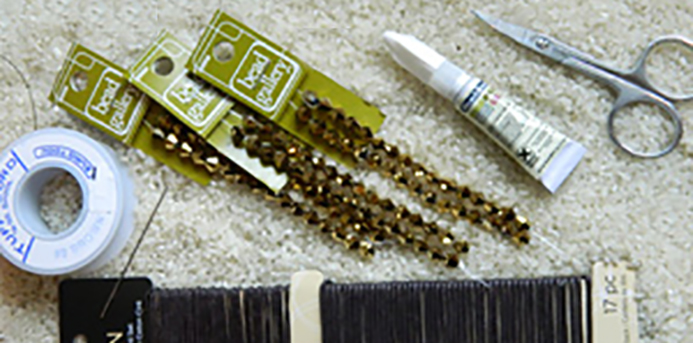
Supplies:
- 2 yards of 2mm round leather cording or waxed cotton cord, lighter weight
- 1 small button for the closure
- A sewing needle or bead needle
- 3 yards of colored non-elastic jewelry thread- I used Tuff-Cord #2 Brown
- Uniform beads: these should not be too much bigger than your cord
- Bead Fix Glue
You can find these items at Ayla’s Originals International Bead Bazaar or most craft stores with a jewelry section.
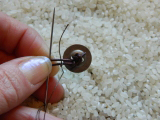
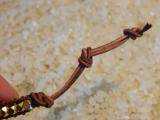
- Start with cording; fold cord in half and cut. Then tie the two sides together about 3 inches from the end, placing the knot so that both cords are now running the same way.
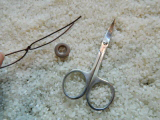
- Thread 1 small button onto one of the cords above the knot, and use the other to make a double knot on the underside of the button to secure it.
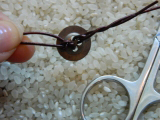
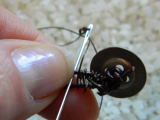
- Thread a needle with the jewelry thread, and knot so that the thread stays put. Lay your two cords flat on a surface with ¼ inch between, so that one cord is the lower and one is the upper. It will help to keep your upper and lower cords straight if you secure your cords at the top with a clip board clip or tape it to your workstation.
- Using the end of the thread, tie a double knot around the lower cord near the button end. Run the needle and thread over and under the cords in a figure 8 pattern: behind the lower cord, up between the two, and around the top of the upper cord. After a few times, tie a double knot before you start threading the beads.
- It is best to use uniform beads. Begin with the thread going beneath the lower cord, through the middle, and above the upper cord. Thread the first bead onto the needle and hold between the two cords with your fingers. Loop the thread over the top of the upper, around the back, and bring it back to the middle area to thread the needle going the other way down through the same bead. Threads should only be seen going around the cords and into and out of the beads.
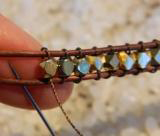
- Continue with this over/under pattern, adding a bead at a time, making sure that the thread wraps around both cords and goes both up and down through each bead. When you have your desired length, weave just the thread in the figure 8 pattern between the cords to secure the end of the bracelet, double knot the thread, and trim. If any of the beads are puckering, use a small dab of Bead Fix Glue to hold its place on the cord.
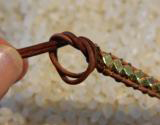
- Tie a knot in the two cords at the end after the figure 8, then another knot so that there is an opening large enough for the button to go through between the knots. Trim the leather cord. Dab knots with glue to hold. Figure out what to do with the $260 you just saved… and people think Giselle is amazing.
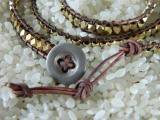
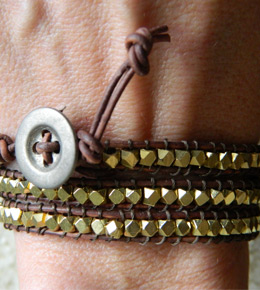
- Finished Results